vCloud Director Federation with IBM Cloud Identity

Update: 2019/10/01

The guide was initially written for vCloud Director 9.7. From vCloud Director version 10 the SAML assertion sent from VCD for service initiated login has changed (AssertionConsumerServiceIndex with index value 0 is used instead  of ProtocolBinding). To accommodate the change, the steps 3 and 6 of the guide have small changes. The IdP initiated login will still work.

IBM Cloud Identity is a cloud SaaS Single Sign-On solution supporting multifactor authentication and identity governance. In this article I will describe how to integrate it with vCloud Director, where vCloud Director acts as a service provider and IBM Cloud Identity as an identity provider.

I have already wrote numerous posts how to federate vCloud Director with Microsoft Active Director Federation Service, VMware Identity Manager and vCenter Single Sign-On.  What makes the integration different for IBM Cloud Identity is that it does not accept vCloud Director metadata XML for simple service provider setup and thus the integration requires more steps.

IBM Cloud Identity is a SaaS service and can be for free set up in a few minutes. It is pretty straight forward and I will skip that part.

As usual, in vCloud Director as Organization Administrator we must prepare the organization for federation. It means making sure that in the in the Administration > Settings > Federation the Entity ID is not empty and up-to-date certificate is generated that will be used to trust and secure the SAML2 assertion exchange between IdP and vCloud Director. The vCloud Director autogenerated self-signed certificate has always 1 year validity, which means once a year it must be regenerated (and the IdP reconfigured). The Organization Administrator is alerted via email when the expiration date is approaching. With vCloud API it is possible to provide your own publicly trusted certificate (with possibly longer validity).

Now we can download the metadata XML from the link provided on the same screen. As mentioned above we unfortunately cannot just upload it to IBM Cloud Identity, instead we need to manually retrieve the correct information from the downloaded spring_saml_metadata.xml file.

We will need the federation certificate (<ds:X509Certificate>) saved as properly formated PEM file:
—–BEGIN CERTIFICATE—–

—–END CERTIFICATE—–

Assertion consumer service URL which is in my case: https://vcloud.fojta.com/cloud/org/ibm/saml/SSO/alias/vcd

and entityID – in my case IBM.

Now in IBM Cloud Identity we can set up the application:

  1. Upload the vCloud Director federation certificate in Settings  > Certificates > Add Signer Certificate:
  2. Create new application in Applications > Add > Custom Application and set up General details like Description, icon and Application Owners.
  3. Now in Sign-On submenu we can enter all details we have collected from vCloud Director:
    – Sign-on Method: SAML2.0
    – Provider ID: <EntityID>
    – Assertion Consumer Service URL
    – optionally check Use identity provider initiated single sign-on checkbox and provide Target URL in BASE64 encoded string (in my case I used H5 tenant endpoint URL: https://vcloud.fojta.com/tenant/ibm which base64 encoded translates to: aHR0cHM6Ly92Y2xvdWQuZm9qdGEuY29tL3RlbmFudC9pYm0
    – Service Provider SSO URL (same as Assertion Consumer Service URL)
    – check Sign authentication response and pick Signature Althorithm RSA_SHA256
    – check Validate SAML request signature and pick the certificate from step #1
    – optionally check Encrypt assertion
    – Name Identifier: preferred_username
    – NameID Format: urn:oasis:names:tc:SAML:1.1:nameid-format:emailAddress

    vCloud Director 10+ changes:
    – Check Use unique ID.
    – Click on Add another URL.
    – Type a valid dummy URL that is different than the first one. For example: https://vcloud.fojta.com/login/org/ibm/saml/alias/vcd
    – Adjust Index values so they start from 0.

  4. Uncheck: Send all known user attributes in the SAML assertion and instead provide custom list of Attributes to be used. vCloud Director supports the following attributes:
    UserName
    EmailAddress
    http://schemas.xmlsoap.org/ws/2005/05/identity/claims/surname
    http://schemas.xmlsoap.org/ws/2005/05/identity/claims/givenname
    Groups
    Role
    You can configure the mapping to each. I used preferred_username to be used for vCloud Director username (but alternatively email could be used as well) and did not map Role attribute as I will manage roles in vCloud Director and not leverage Defer to Indentity Provider Role.
  5. Configure Access Policies and Entitlements to specify which users/groups can use vCloud Director.
  6. After saving the application configuration, we can retrieve its SAML2.0 federation metadata from the link provided on the right side of the Sign-On screen.
    vCloud Director 10+ change:
    Use the (Unique ID) link below:
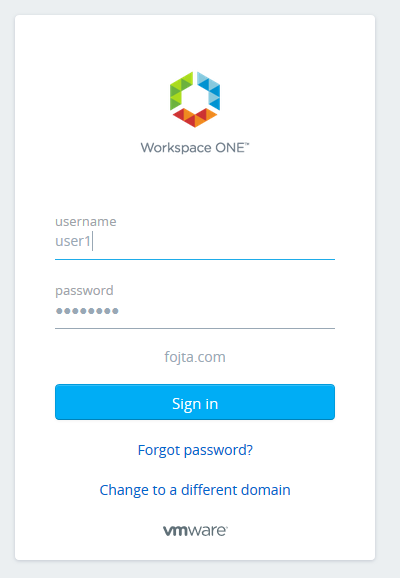
  7. Back in vCloud Director > Administration > Settings > Federation check Use SAML Identity Provider and upload the downloaded metadata.xml file from the previous step.
  8. Finally we need to import SAML users/groups and assign their role.

If everything done correctly you should be able to login both from IBM Cloud Identity and vCloud Director with the IdP user.

vCloud Director Federation with VMware Identity Manager

Although in the past I have already blogged about vCloud Director federation with VMware Workspace and Microsoft AD FS I still have not wrote a guide how to achieve organization federation with VMware Identity Manager.

VMware Identity Manager (VIDM) is Single Sign-On solution that integrates with multiple identity providers (such as Active Directory) and offers App Store like access to multiple subscribed services with adaptive access (including multi factor authentication such as VMware Verify, DUO or RSA SecurID).

Users can easily log in into multiple different cloud services from a single page thanks to SSO. One such service can be vCloud Director and this article describes how to achieve this.

VIDM is provided as virtual appliance that can be deployed in  a load balanced distributed or simple configuration with external Microsoft SQL database or for evaluation purposes with embedded PostgreSQL. It is also provided as a cloud service.

I have deployed in my lab VIDM 3.2 in a single embedded database configuration and connected it to my lab Active Directory. VIDM also provides its own internal IdP (System Domain) so can be used also without an external AD/LDAP.

  1. In vCloud Director Organization enable Federation by setting Entity ID to Org Name (or any other unique string), generate fresh certificate and download Metadata from the link provided (file spring_saml_metadata.xml). This can be done as system or Organization Administrator.
  2. In VIDM go to Catalog and create new web application. You have to be logged in as VIDM Administrator. Write application name, description and upload nice icon and choose category. 
  3. In the next screen keep Authentication Type SAML 2.0 and paste the xml metadata from step #1 into the URL/XML window. Scroll down to Advanced Properties. 
  4. In Advanced Properties we will keep the defaults but add Custom Attribute Mappings which describe how VIDM user attributes will translate to VCD user attributes. Here is the list:
Name                                                               Value
-------------------------------------------------------------------------------------
UserName                                                           ${user.userName}
EmailAddress                                                       ${user.email}
http://schemas.xmlsoap.org/ws/2005/05/identity/claims/surname      ${user.lastName}
http://schemas.xmlsoap.org/ws/2005/05/identity/claims/givenname    ${user.firstName}
Groups                                                             CokeAdmins
Roles                                                              ${user.employeeID}

Format is always basic and namespace is blank. Let me explain what is going on here. The first two mappings should be clear. UserName specify how will the user be recognized by vCloud Director and EmailAddress will be his/her email address for notifications. The next two parameters contain given name and surname which VCD will combine into full name. Not sure why the assertion name needs to be specified in such long format but only this way it worked for me. In theory you could also pass ‘fullname’ if you have field in your directory that contains full name (my Active Director does not).

Next we have Groups. I do not know how to pass AD groups in a dynamic way, so this is a hardcoded example – all users who use this SaaS definition will belong to CokeAdmins group. You can obviously omit this if you will only import users by name.

The last property is Role – again this is optional and should be used only if we want to manage roles in IdPs and not in VCD, where we would import the user with Defer to Identity Provider role – see here for more details. I am using here unused AD Employee ID field. 

  1. Now we can finish the wizard by clicking next, select access policy (keep default) and reviewing the Summary on the next screen. As last step we can click Save & Assign, where we are presented to select users that should have this newly created App in their catalog.
  2. Next we need to retrieve metadata configuration of VIDM – this is by going back to Catalog (all the way up) and clicking Settings. From SAML Metadata download Identity Provider (IdP) metadata. 
  3. Now we can finalize SAML configuration in vCloud Director. Still on Federation page click Use SAML Identity Provider checkbox and import the downloaded metadata (idp.xml) with Browse and Upload buttons and click Apply. 
  4. From now on, login screen will default to SAML authentication, but you can always revert to local authentication with: https://<vcloud_fqdn>/cloud/org/<org-name>/login.jsp
    However, we first need to import some users/groups to be able to use SAML. You might need to re-login to see the option to add SAML users and groups. You can import VIDM users by their user name or group (the hardcoded name CokeAdmins). We can assign role or optionally leverage Defer to IdP (if you have role field populated in AD). 
  5. Login to VIDM and click on the application tile to be logged straight into VCD Organization (the Flex legacy UI). 

You can also directly enter the Flex or HTML 5 URL and you will be redirected to VIDM login screen.

As mentioned in step 4, I am managing user roles from Active Directory so I just need to import one group into VCD with Defer to IdP role and I am done with user management in VCD. The role field that VIDM uses is EmployeeID, however that field in AD can have only numerical value and VCD expects role as text string. The workaround I am using is that in AD I actually use User Description field and then in VIDM I have changed the mapping. So lets first have a look how it looks in AD:

Here is my VIDM custom AD IdP mapping:


vCloud Director 9: SAML2 Federation for System Administrators

In the past in vCloud Director 8.20 (and older versions) system admins (the provider context) could use local, LDAP and vSphere SSO accounts. vCloud Director 9.0 now replaces vSphere SSO accounts with more generic SAML2 accounts which means you can have the same IdP mechanism in the tenant and system context.

This change however breaks the previous vSphere SSO federation which was as simple as entering the vSphere Lookup Service URL and enabling the vSphere Single Sign-On with a check box (which in vCloud Director 9.0 is no longer there).

Here is the procedure how to enable vSphere Single Sign-On in vCloud Director 9.0.

  1. Login to vCloud Director as system admin and from administration>System Settings/Federation download the metadata document (spring_saml_metadata.xml) from the link provided (../cloud/org/System/saml/metadata/alias/vcd). Make sure the certificate (below) is valid.
  2. Login to vSphere Web Client as SSO admin and go to Administration/Single Sign-On/Configuration/SAML Service Providers
  3. Import the metadata from step #1
  4. Download the vsphere.local.xml metadata from the link below.
  5. Go back to VCD, check use SAML Identity Provider and upload metadata from #4.

Note that Import Users/Group source now changes from vSphere SSO to SAML.

vCloud Director 8.20
vCloud Director 9.0


Update 6-27-2018

Some additional notes about issues you might experience in order to get proper functionality of vCenter SSO federation:

  • Make sure that Public Addresses section contains correct FQDN of vCloud Director (pointing to the VIP of the load balancer)
  • Also make sure that the full certificate chain is uploaded as well (cert+intermediate+root)

  • Make sure vCloud Director is registered in vCenter SSO Lookup Service (Federation section – vSphere Services)
  • If you change vCloud Director public name or certificate, re-register vCloud Director to Lookup Service
  • If you change vCloud Director public name you must regenerate federation certificate by clicking Regenerate button to update endpoint addresses in the Metadata document.
  • The federation certificate has 1 year duration. You can use vCloud API to upload your own certificate with extended duration (PUT /admin/org/{id}/settings/federation)

Update 2/22/2021

vSphere 7 does not have the UI to export IdP and import service provider SAML metadata. You can still use vCenter CLI to achieve the same:

/opt/vmware/bin/sso-config.sh -get_sso_saml2_metadata -t vsphere.local /tmp/vsphere.local.xml
/opt/vmware/bin/sso-config.sh -register_sp -t vsphere.local /tmp/spring_saml_metadata.xml

Configure Active Directory Federation for vCloud Director Organization

Configure Active Directory Federation for vCloud Director Organization

vCloud Director tenants can federate their on-premises identity source with vCloud Director to simplify user management in their vCloud organization. I have already wrote blog post about this topic in the past; this time I will provide step by step instructions how to federate Active Directory with Active Directory Federation Services (AD FS).

Installation and configuration of AD FS is out of scope for this article as there are already very good and detailed guides on the internet.

  1. Download AD FS SAML2 metadata from your AD FS server (https://adfs.acme.com/FederationMetadata/2007-06/FederationMetadata.xml)
  2. As Org Administrator log into vCloud Director and in Administration > Settings > Federation check Use SAML Identity Provider checkbox and upload FederationMetadata file from #1.
  3. Still on the same page fill in Entity ID (must be unique for given IdP) and regenerate certificate. It will be valid for 1 year after which it must be regenerated again.
    Note: Entity ID is available only in vCloud Director 8.10 and newer.
  4. Click Apply.
  5. Download SAML metadata file from https://<vcd_url>/cloud/org/<org-name>/saml/medatadata/alias/vcd.
    Note: vCloud Director 8.10 provides link to the file just above the Certificate Expiration button.
    vcd-config-saml
  6. In Administration > Memebers > Users import SSO users from the SAML source. As user name use email address. Assign a vCloud role.
  7. It is also possible to import SSO groups from the SAML source. However, Groups menu might be missing under Users until you refresh the page (Groups menu got enabled by the step #2). For group import simply use AD group name (without domain).
    Note: If you get log out before setting up AD FS you can always go back to native authentication dialog by entering the following URL: https://<vcd_url>/cloud/org/<org-name>/login.jsp
    groups
  8. That’s all for vCloud Director configuration. The rest must be done in AD FS. Open AD FS Management Console and in Actions menu cling on Add Relying Party Trust. Go through the wizzard and import the SAML metadata file from step #5.
  9. Next we need to Edit claim rules. Under Issuance Transform Rules, using Send LDAP Atributes as Claims template create LDAP claim rule that uses Active Directory as Attribute Store and maps E-Mail-Addresses to E-Mail Address and Token-Groups – Unqualified Names to Groups.
    claim1
  10. Add another transform rule from Transform an Incoming Claim template that transforms E-Mail Address to Name ID.claim2
  11. Last thing that needs to be done is changing Relying Party Trust hashing algorithm from SHA-256 to SHA-1 (can be found in Properties > Advanced).

That’s all, now depending how your browser is configured, when you enter vCloud Director Organization URL you will be redirected to authentication dialog (either native browser or at the AD FS website). Enter AD credentials and if the user had been properly imported into vCloud Director (as individual user or member of a group) you should be logged into vCloud Director UI.


Edit 11/24/2016: My faithful readers (thank you Julius) have provided additional links for federations with other IdP solutions:

SafeNet Authentication Service: Integration Guide

RSA SecureID: blog post

vCloud Director – vCenter Single Sign-On Integration Troubleshooting

The access to vCloud Director provider context (system administrator accounts) can be federated with vCenter Single Sign-On. This means that when vCloud system administrator wants to log into the vCloud Director (http://vCloud-FQDN/cloud) he is redirected to vSphere Web Client where he needs to authenticate and then redirected back to vCloud Director.

VCD_SSO_Federation

Here follows collection of topics that might be useful when dealing when troubleshooting the federation:

1. When the SSO federation is enabled the end-user is always redirected to vSphere Web client. If you want to use local authentication use http://vCloud-FQDN/cloud/login.jsp and type local or LDAP account (if LDAP is configured).

2. If you enabled SSO federation and the vCenter SSO is no longer available, you cannot unregister its lookup service. To do this go to vCloud database and in dbo.config table clear the lookupservice.url value.

3. In case you are using self-signed untrusted certificate on the vSphere web client some browsers (Firefox) might not display the Add Security Exception button when being redirected. Therefore open first the vSphere web client page directly, create the security exception and then the redirection from vCloud website should work.

4. HTTP ERROR 500. Problem accessing /cloud/saml/HoKSSO/alias/vcd. Reason: Error determining metadata contracts
….
Metadata for issuer https://xxx:7444/STS wasn’t found

This error might appear after the vSphere web client SSO authentication when the user is redirected back to vCloud portal. To understand this error let’s first talk about what is going on in the background. When the SSO federation is enabled, vCloud Director establishes trust with vCenter SSO. The trust is needed so the identity provider (SSO) knows that the request for authentication is not malicious (phishing) and also the service provider (vCloud Director) needs to be sure the reply comes from the right identity provider.

The trust is established when the federation is configured with metadata exchange that contains keys and some information about the other party. The SSO metadata can be seen in vCloud Director database in the dbo.saml_id_provider_settings table. Now during the actual authentication process if for some reason the security token reply comes from different source than the one expected based on the identity provider metadata, you will get this error.

This issue might happen for example if the vCenter SSO hostname has been changed. In this particular case which I encountered it happened on vCenter Server Appliance 5.1. The SSO has been initiated before the hostname was set. So the identity provider response came with metadata containing the issuer’s IP address instead FQDN which the service provider (VCD) expected based on the SSO endpoint address. The issuer information did not get updated after the hostname change.

The VCSA 5.1 the issuer information is stored in SSO PostgreSQL DB. These are the steps to change it:

  1. Get the SSO DB instance name, user and password

cat /usr/lib/vmware-sso/webapps/lookupservice/WEB-INF/classes/config.properties

db.type=postgres
db.url=jdbc:postgresql://localhost:5432/ssodb
db.user=ssod
db.pass=rTjsz9PRPLOFswBkJTCNAAVp
`

  1. Connect to the DB with the password retrieved from the previous step (db.pass=…)

/opt/vmware/vpostgres/1.0/bin/psql ssodb -U ssod

Retrieve the STS issuer:

ssodb=> select issuer from ims_sts_config;

If the issuer is really incorrect update it with following command:

ssodb=> update ims_sts_config SET issuer='https://FQDN:7444/STS'

Note: I need to credit William Lam for helping me where to find the SSO DB password.