One of our labs had a temporary storage issue which left two NSX-T Managers (separate instances of NSX-T installation) in a corrupted state. Here are some steps you can take to attempt to revive the NSX-T Manager appliance back to life. BTW these steps might work for Edge Nodes as well.
The issue starts with the appliance having file system in read only mode. After reboot you will see a message:UNEXPECTED INCONSISTENCY: RUN fsck Manually

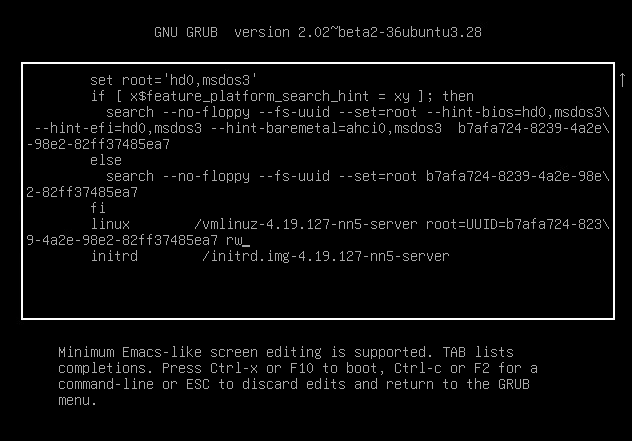
The first step is to go into appliance GRUB menu that appears briefly after start up, hit e key, enter root/VMware1 GRUB credentials (these are different from the regular credentials) and edit the line with starting with linux and replace ro with rw and delete the rest of the line.
Note (4/10/2024): Newer versions of NSX use GRUB password: NSX@VM!WaR10

Continue with the boot process by pressing Ctrl+x. Hopefully now you are able to get into BusyBox shell and run fsck /dev/sda2 or similar to fix the corrupted partition. Reboot.
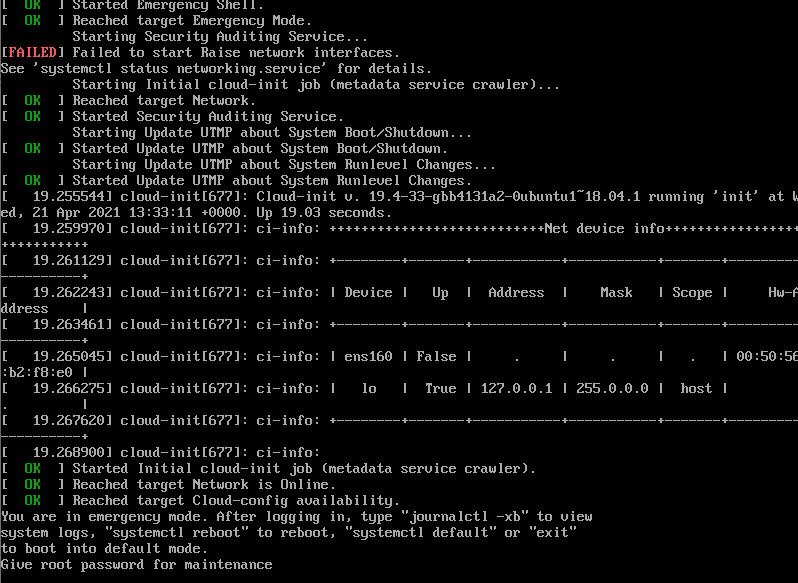
What can happen now is that the appliance will boot but again will find LVM corruption and will go into emergency mode and you can see repeated Login incorrect messages.

Repeat the process with the GRUB edit. This time you will be asked to enter root password to go into maintenance mode.

Type the root password and follow this KB article by typing fsck /dev/mapper/nsx-tmp command. Reboot again.
Hopefully now the appliance starts properly.
What can also happen is that your root password expired and you will not be able to enter the maintenance mode. Although the official documentation has a process how to reset it, the process will not work in this case. The workaround is again in the GRUB menu edit the linux line, replace ro with rw but then append init=/bin/bash. You should be able to get to the shell and reset your password with passwd command.
Good luck with the recovery and do not forget to set up backup and disable password expiration.
I have gone through this and i get /dev/mapper/nsx-tmp is mounted e2fsck: Cannot continue, aborting
I got the same issue… Any one got a fix?
you can’t run fsck on a mounted volume. Unmount it then run fsck again. You’ll be rebooting after so you don’t need to re-mount it yourself.
The NSX Grub password has changed. NSX@VM!WaR10.
https://docs.vmware.com/en/VMware-NSX-T-Data-Center/3.2/installation/GUID-4630C9D5-71FB-4991-AC1D-9FDBA0B86120.html
In may case i also had to fix the log directory with fsck /dev/mapper/nsx-var+log
and fsck /dev/mapper/nsx-secondary
You need to pay attention to the error message. In the example above it says “/dev/sda2” but on my NSX managers I’m getting the error on sda3 so I had to adapt the fsck command. Also, add “-y” to the fsck command to automatically accept all changes else it’s going to ask you if you want each and every item fixed, one-by-one!